-
C# Environment Setup
-
The environment to write a C# Program is called an IDE(Integrated Development Environment), an IDE is used to Edit and Compile Code.
In this chapter, we will discuss the tools required for creating C# programs. In Introduction, we have already discussed that C# is part of .Net framework and is used for writing .Net applications. Therefore, before discussing the available tools for running a C# program, let us understand how C# relates to the .Net framework.
The .Net Framework
The .Net framework is a framework that helps to write the following types of applications:- Windows applications
- Web applications
- Web services
The .Net framework applications are multi-platform applications. The framework has been designed in such a way that it can be used from any of the following languages: C#, C++, Visual Basic, Jscript, COBOL, etc. Therefore, all these languages can access the framework as well as communicate with each other.
The .Net framework consists of an extensive library of codes used by the client languages such as C#. Following are some of the components of the .Net framework:- Common Language Runtime (CLR)
- The .Net Framework Class Library
- Common Language Specification
- Common Type System
- Metadata and Assemblies
- Windows Forms
- ASP.Net and ASP.Net AJAX
- ADO.Net
- Windows Presentation Foundation(WPF)
- Windows Communication Foundation (WCF)
- LINQ
- Entity Framework
Integrated Development Environment (IDE) for C#
In this tutorial, we will use Visual Studio Community, which is free to download from https://visualstudio.microsoft.com/vs/community/.
Applications written in C# use the .NET Framework, so it makes sense to use Visual Studio, as the program, the framework, and the language, are all created by Microsoft.
Note: You need an active internet connection for installation.
.Net Install
Once the Visual Studio Installer is downloaded and installed, choose the .NET workload and click on the Modify or Install button:
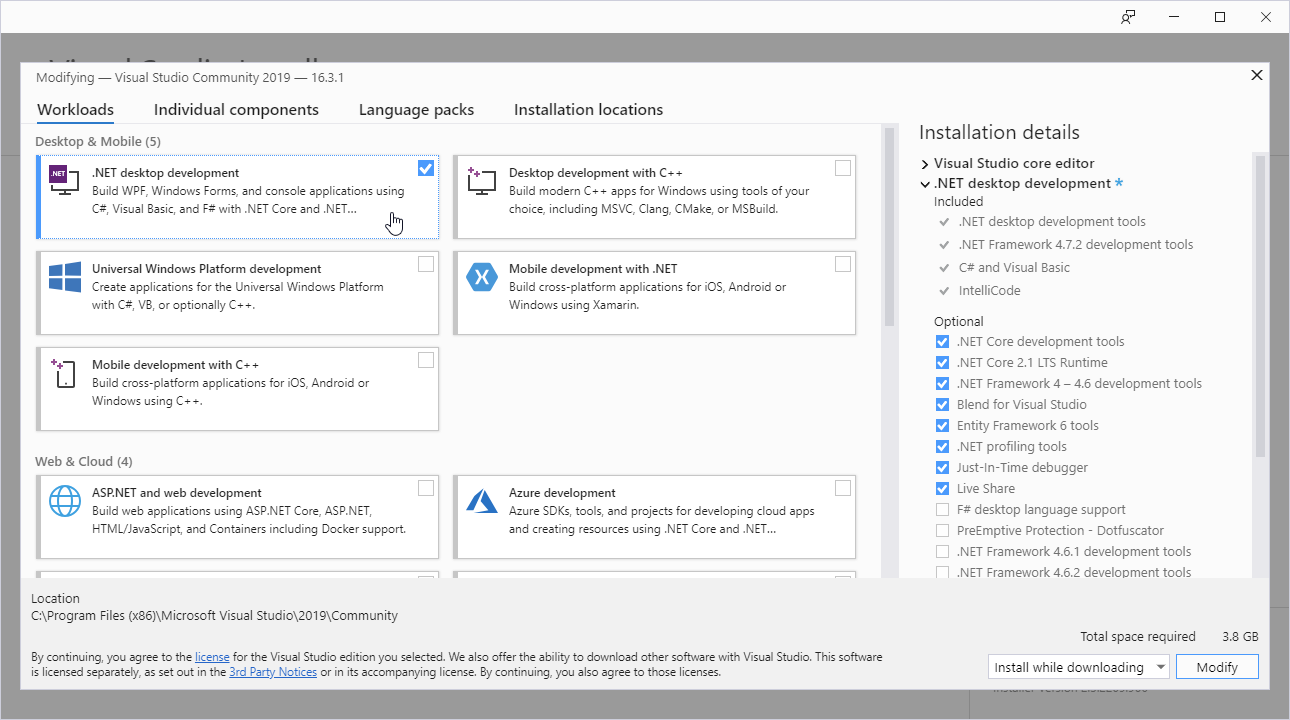
After successful installation, click on the Launch button to get started with Visual Studio.
On the start window, choose Create a new project: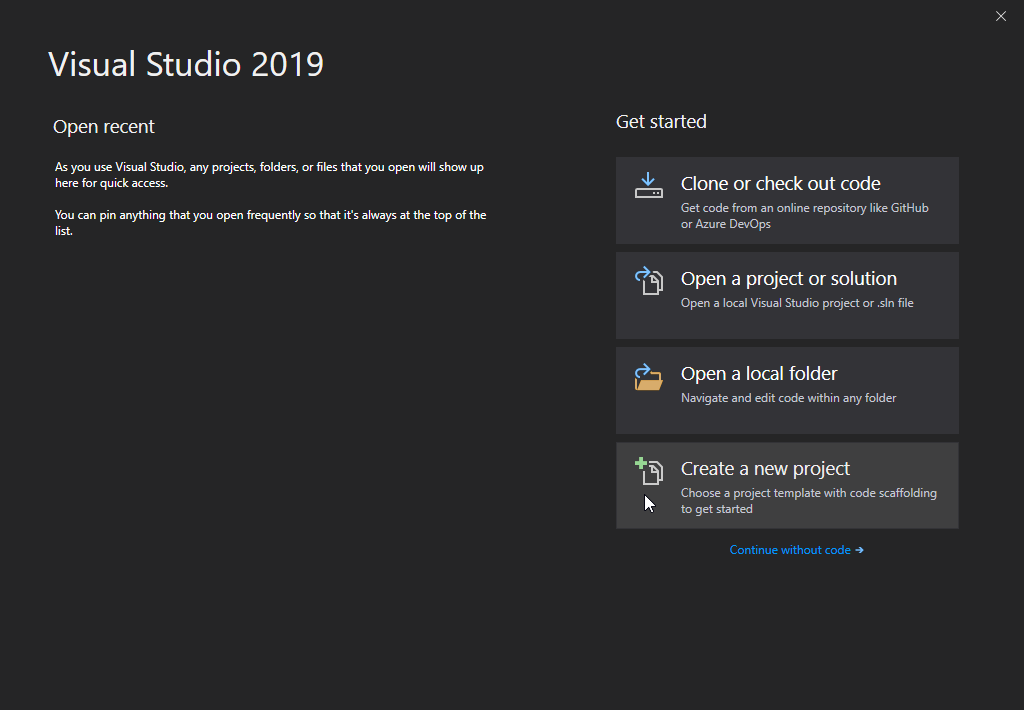
Then click on the "Install more tools and features" link: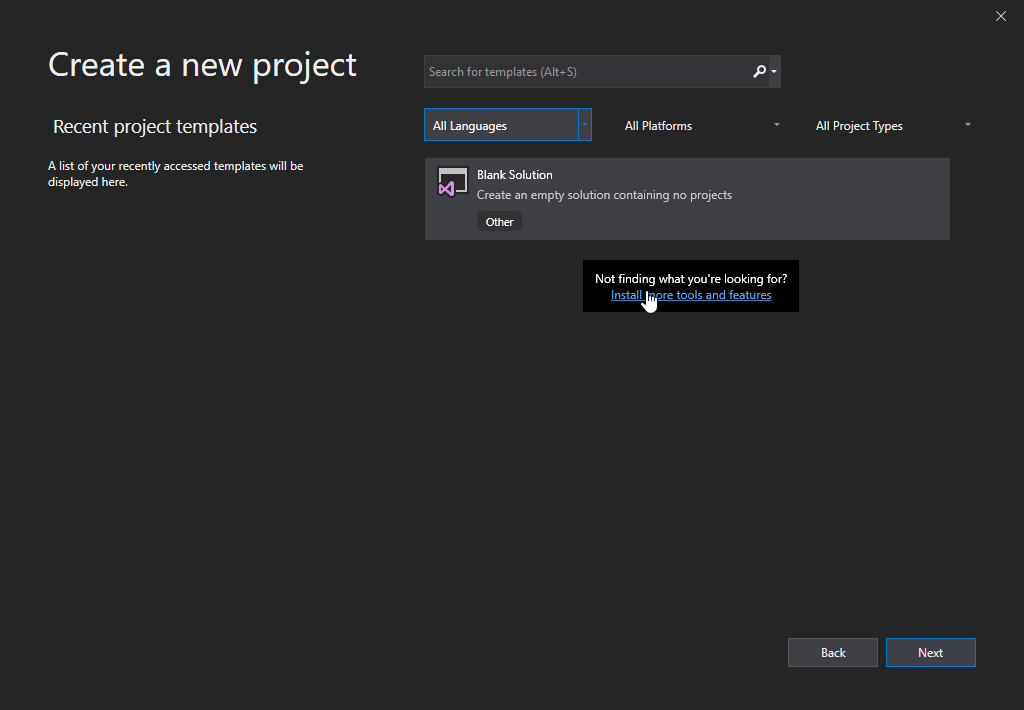
Choose "Console App (.NET Core)" from the list and click on the Next button:
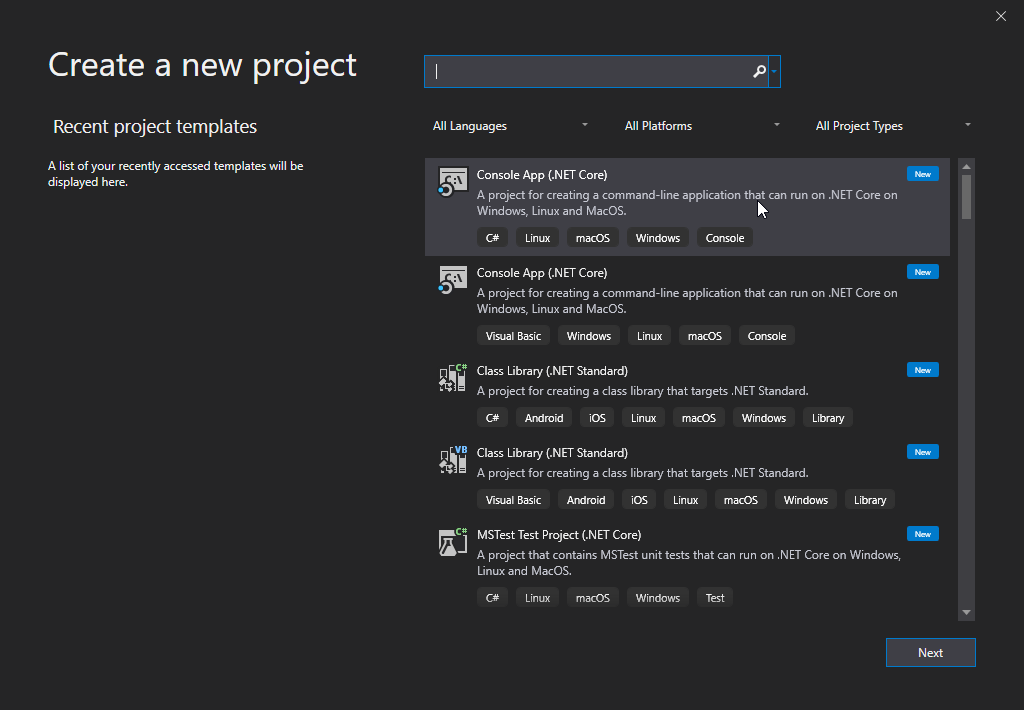
Enter a name for your project, and click on the Create button:
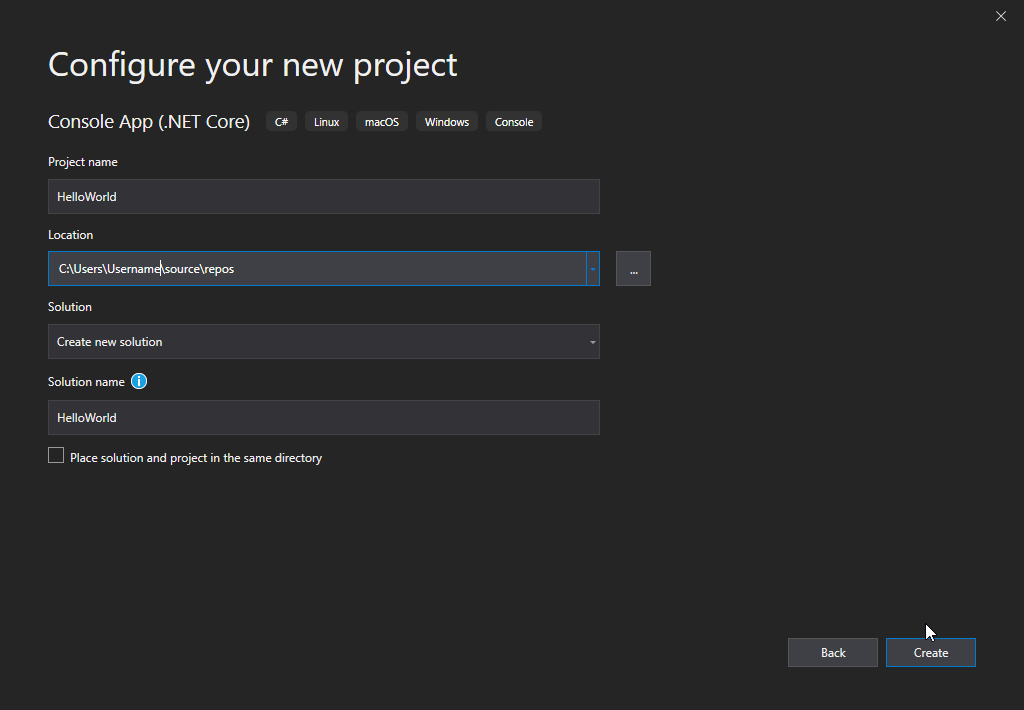
Visual Studio will automatically generate some code for your project:
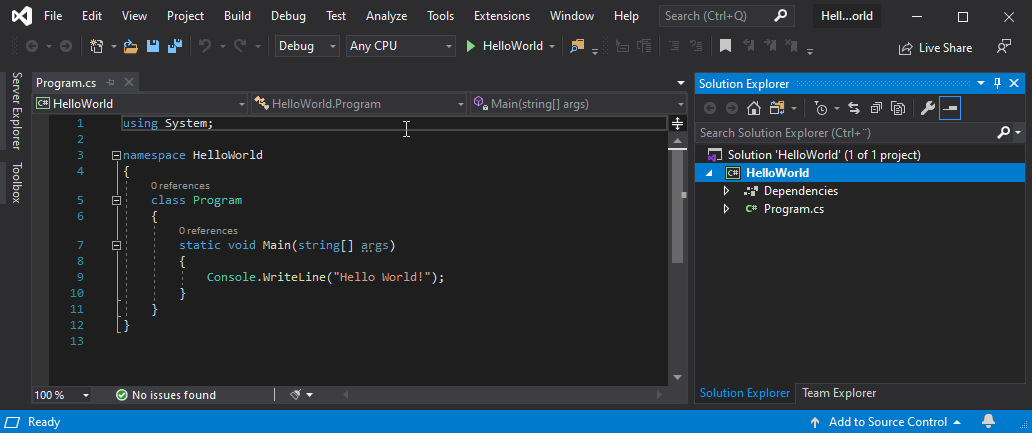
That's it, now we have all the installation and project setup done, in later chapters we will discuss each and everything in detail. For now, lets focus on how to run the code.