-
C# Environment Setup
-
To write and run a C# program, you need a software tool known as an Integrated Development Environment (IDE). An IDE provides a complete workspace where developers can write code, compile it, fix errors, and execute programs from a single interface. Using an IDE makes C# development faster, easier, and more organized.
Integrated Development Environment (IDE) for C#
An Integrated Development Environment (IDE) is a software application that brings together all the essential tools required for software development. Instead of using separate tools for writing code, compiling programs, and debugging errors, an IDE provides everything in a single, unified interface. A well-configured IDE enhances developer's productivity by reducing manual effort and accelerating application development.
Why an IDE Is Important for C# Development
An IDE simplifies the entire development process by offering built-in features that help developers write clean and error-free code.
Reasons - why an IDE is essential:
- It automatically compiles and runs C# programs
- It helps identify errors and warnings while typing
- It offers debugging tools to trace and fix issues
- It manages project files and folders efficiently
Popular IDE for C#:
Visual Studio Visual Studio Community Edition is one of the most widely used IDE. It is free for individual developers, students, and small teams. Visual Studio is designed in a way that C# applications can be managed easily with lots of tools and packages and a user-friendly interface. In latest version, cross platform development is also possible using Visual Studio.
Some key advantages of using Visual Studio include:
- Built-in templates for creating C# projects
- Intelligent code completion (IntelliSense)
- Automatic error detection and suggestions
- Integrated debugger for step-by-step code execution
- Easy project creation and management
Installing Visual Studio for C#
Follow these steps, to set up your C# development environment:
1. Download Visual Studio
Here, we will use Visual Studio Community, which is free to download from https://visualstudio.microsoft.com/vs/community/.
Visual Studio is the preferred IDE for C# development, as it is created by Microsoft and offers native support for the C# language and the .NET ecosystem.2. Run the installer after the download is complete
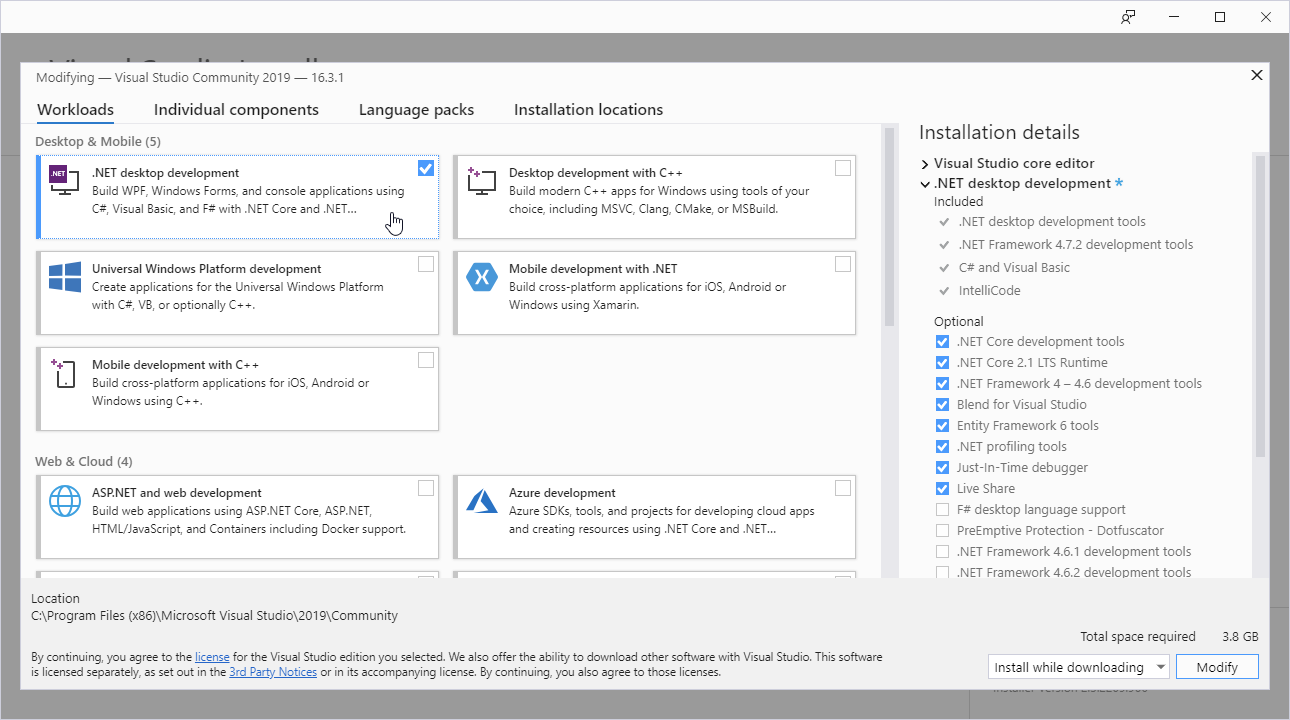
3. Select the .NET workload during installation:
Once the Visual Studio Installer is downloaded and installed, choose the .NET workload and click on the Install button:
4. After successful installation
Click on the Launch button to get started with Visual Studio.
On the start window, choose Create a new project: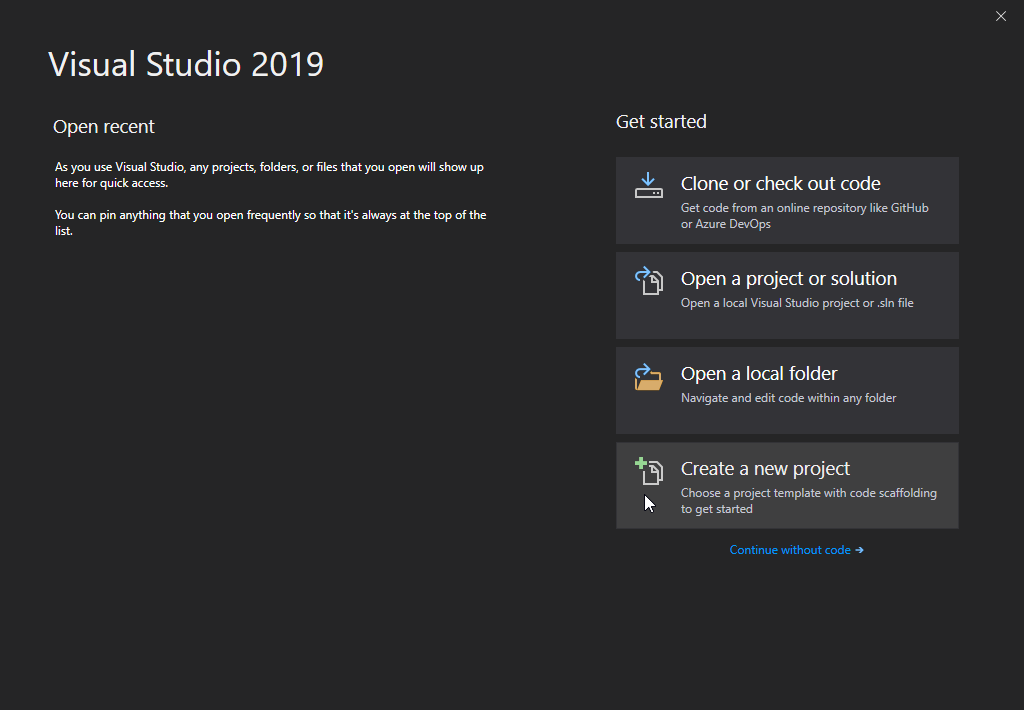
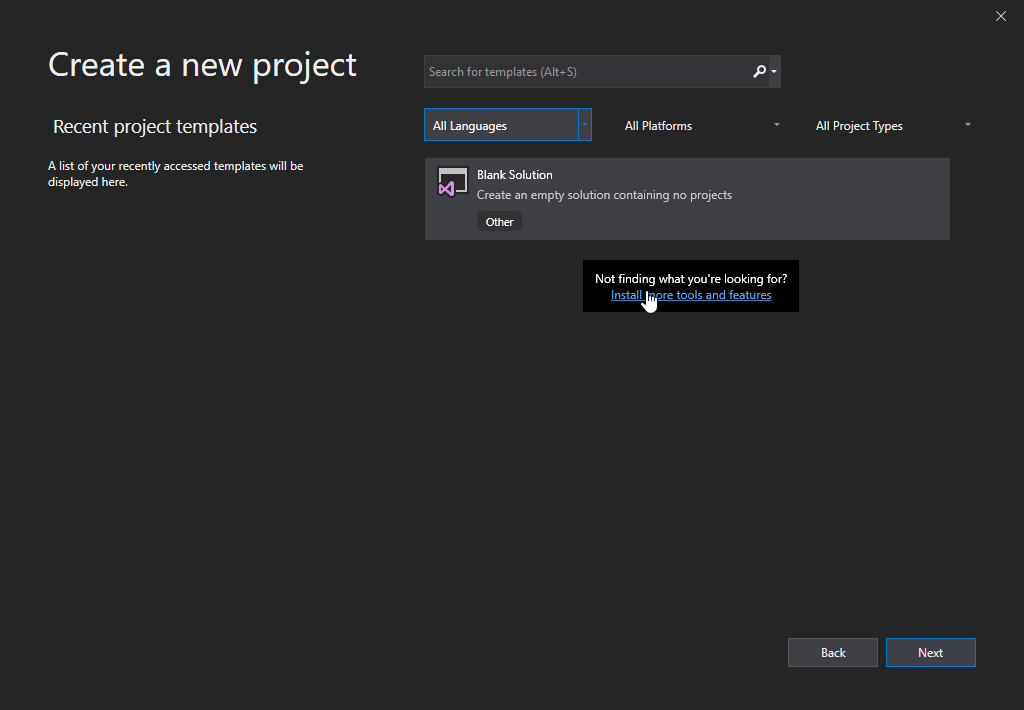
5. Then click on the "Install more tools and features" link:
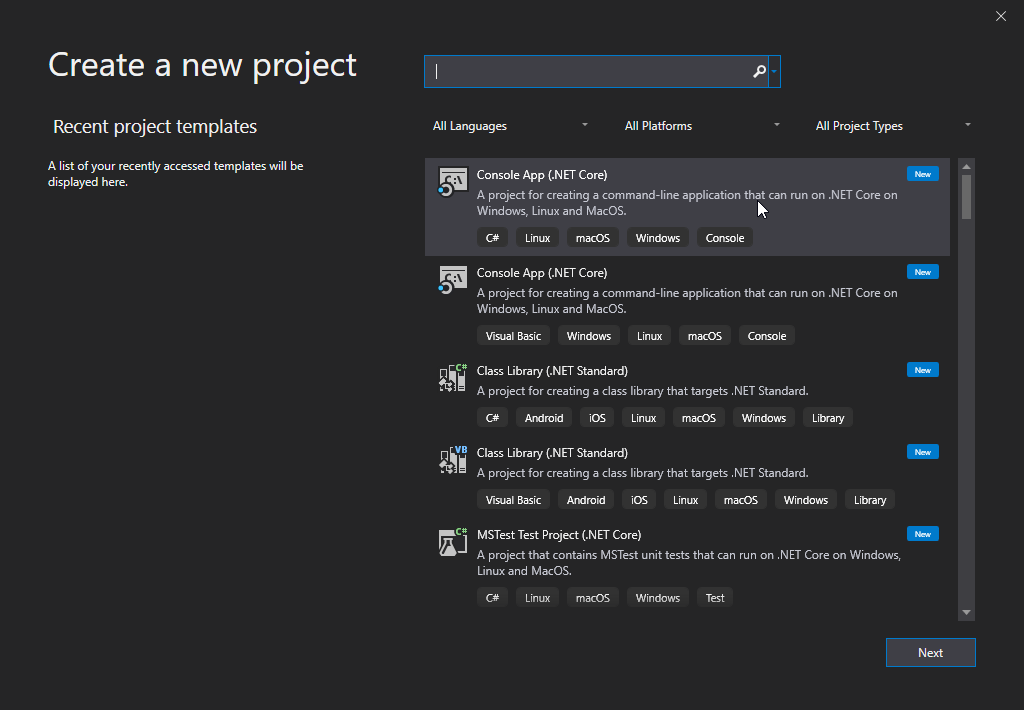
6. Choose "Console App (.NET Core)" from the list and click on the Next button:
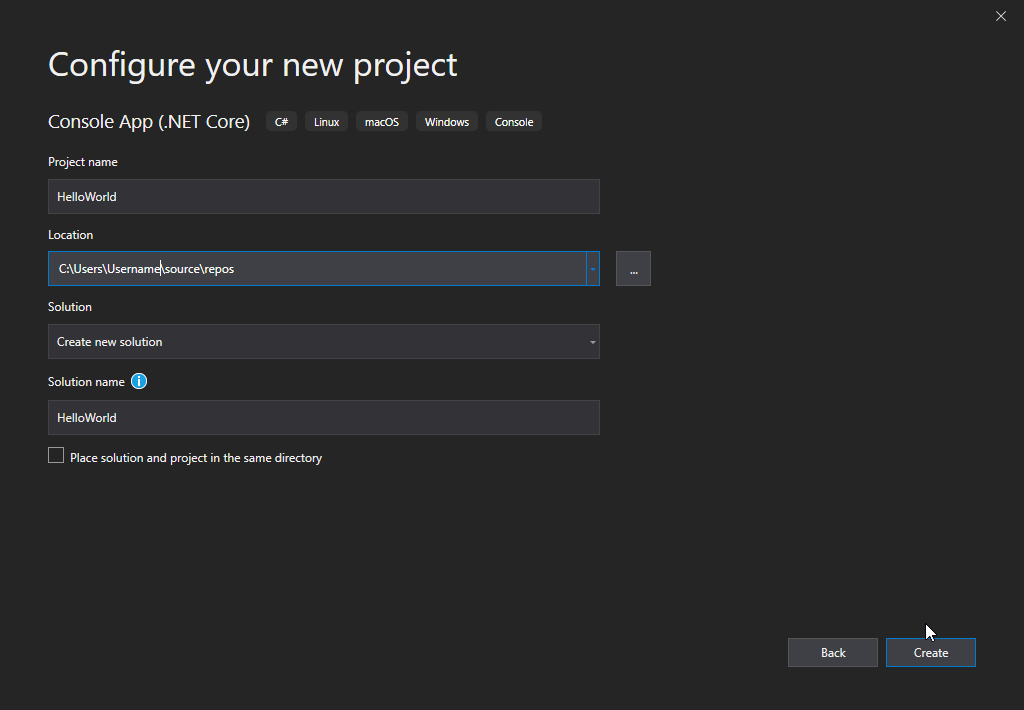
7. Enter a name for your project, and click on the Create button:
8. Visual Studio will automatically generate some code for your project:
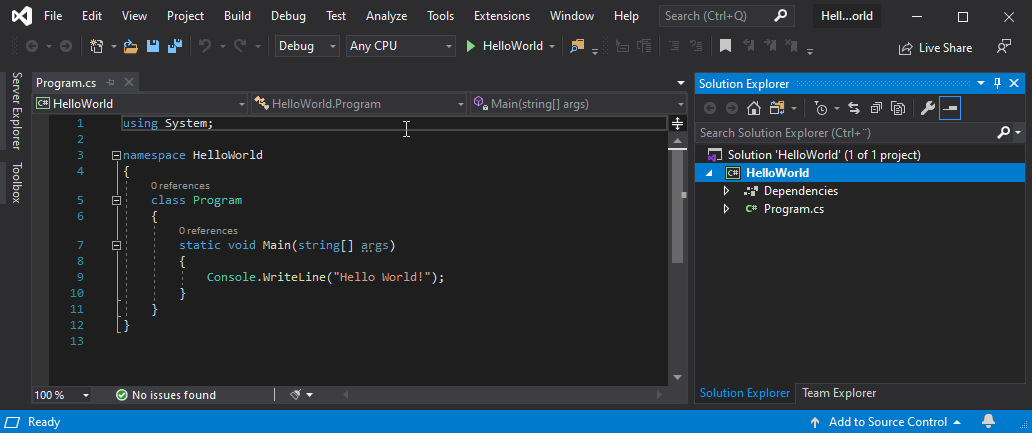
That's it, now we have all the installation and project setup done.
Core Features of an IDE Used in C#
1. Code Editor
The code editor is where we write C# code. It highlights keywords, variables, and syntax in different colors, making the code easier to read and understand. It also formats the code automatically, improving readability.
2. IntelliSense (Smart Code Suggestions)
IntelliSense provides real-time suggestions while typing code.
It helps developers:- Complete class names and methods faster
- Reduce typing errors
- Learn available methods and properties
- This feature is especially useful for beginners.
3. Build and Compile Tools
An IDE compiles the written C# code and converts it into an executable format. It checks for syntax errors and displays meaningful error messages if something goes wrong.
4. Debugger
The debugger helps developers to execute the program line by line. It helps in: Finding logical errors Checking variable values during execution Pausing execution at specific points (breakpoints)
5. Project and File Management
An IDE automatically organizes project files, references, and configuration settings. Developers do not need to manage folders manually, which reduces confusion and mistakes.
6. Error and Warning Indicators
Errors and warnings are shown directly inside the editor. This helps developers fix issues early before running the program.
7. Benefits of Using an IDE
For someone new to C#, an IDE makes learning much easier by:- Providing instant feedback on mistakes
- Reducing manual configuration
- Offering guided project creation
- Making debugging simple and visual
- This allows beginners to focus more on learning the language rather than handling setup complexities.
Conclusion
Visual Studio plays a very important role in application development, it helps in simplifying code writing, its execution, and debugging. Tools like Visual Studio Community Edition provide a complete development environment, making them an ideal choice for both beginners and experienced developers.
Now that the IDE is set up, we can start building and running C# programs efficiently.