-
First Console Application
-
After installing Visual Studio with the .NET workload, the next step is creating your first application. A console application is the simplest way to understand how .NET projects work and how code is compiled and executed.
Step 1 — Open Visual Studio
Launch Visual Studio from the Start menu.
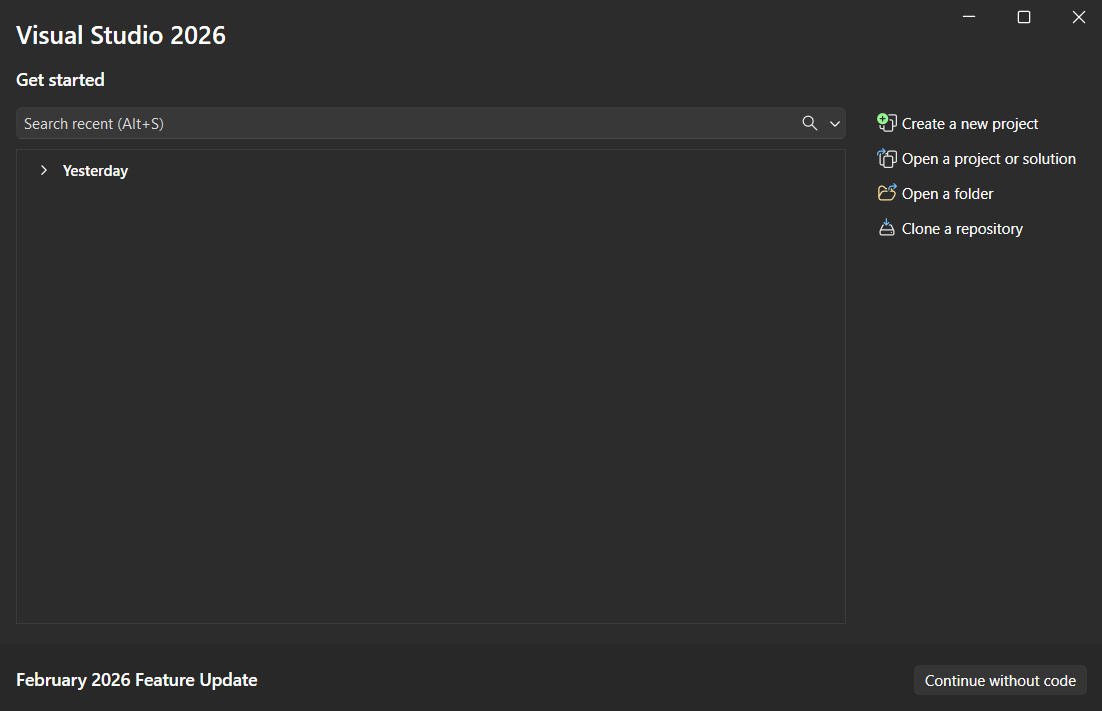
On the start screen, you will see options like:
- Create a new project
- Create a folder
- Open a project or solution
- Clone a repository
- Continue without code
Click:
👉 Create a new project
Step 2 — Choose the Console App Template
In the search box, type: Console
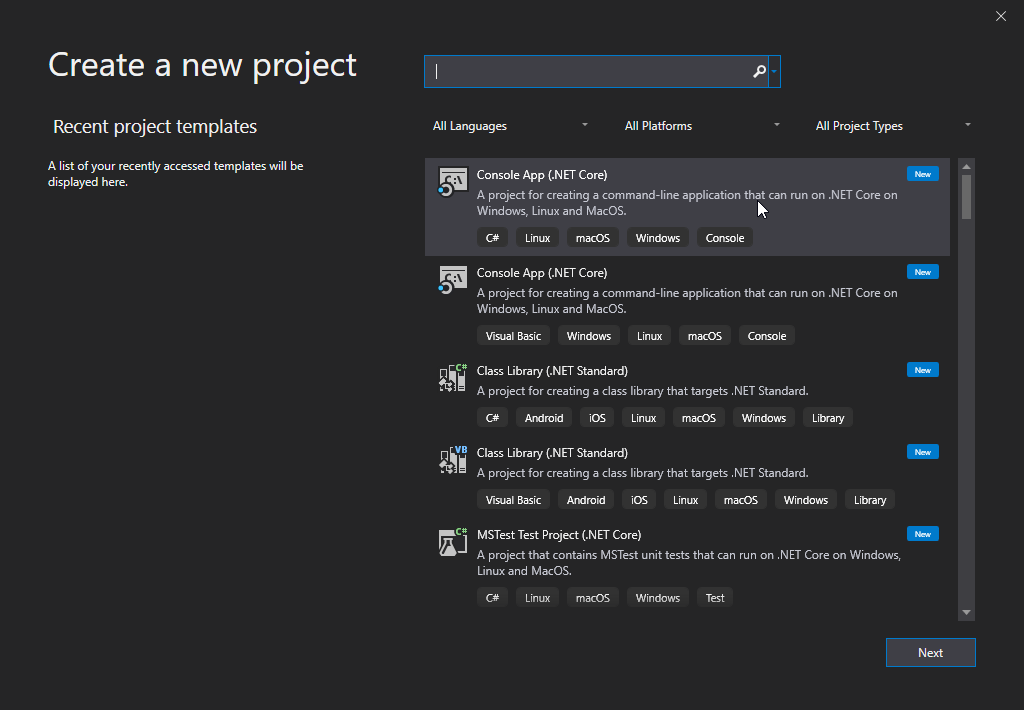
Select: Console App (.NET)
Make sure it shows C# as the language.
Click Next.
Step 3 — Configure the Project
Now you will see project configuration options.
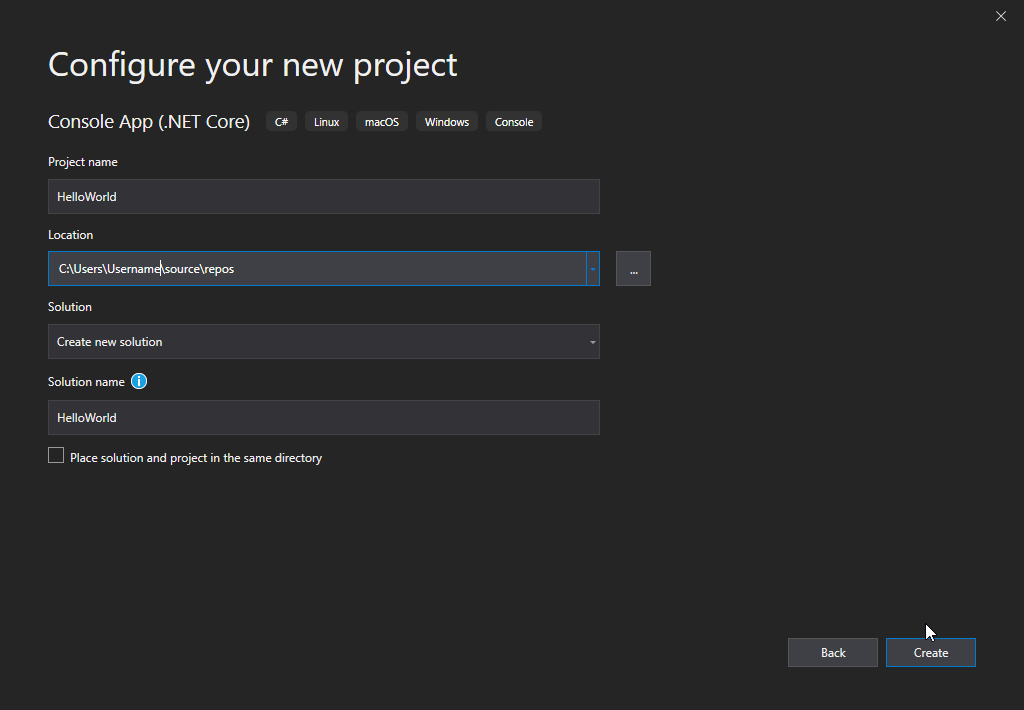
Fill in:- Project Name → e.g., HelloWorld
- Location → Choose a folder
- Solution Name → Can keep default
Step 4 — Choose Framework Version
Select the latest LTS version of .NET (for example, .NET 8).
Click Create.
Visual Studio now generates your project automatically.
Understanding the Generated Files
Once the project opens, you’ll see:
Solution Explorer
On the right side, showing:
- Program.cs
- .csproj file
- Dependencies
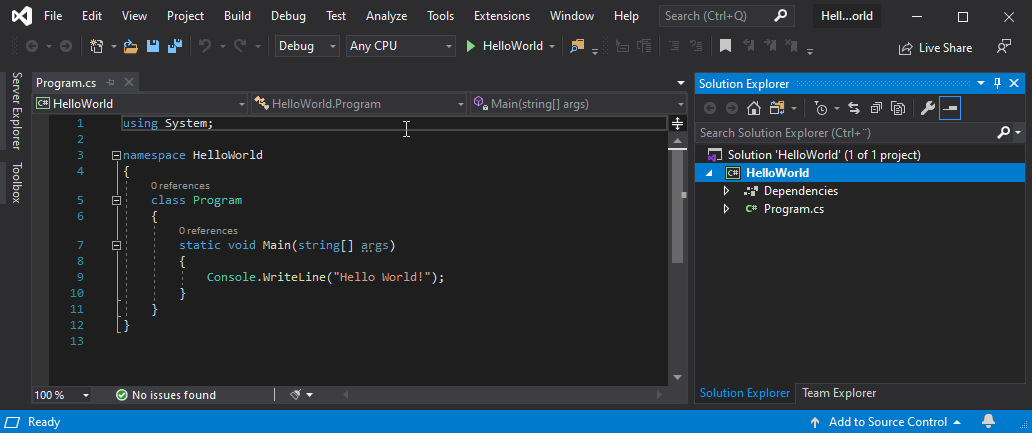
This is the entry point of your application.
In modern .NET versions, the Main method is simplified automatically. When the application runs, this line executes first.
Step 5 — Run the Application
To run the project:
Click the green Run button
or press: F5
A console window appears showing:
Hello, World!Congratulations — you just built and executed your first .NET application.
How Does It Work Behind the Scenes?
When you press Run:
- Visual Studio compiles your code.
- The .NET SDK builds the project.
- An executable is created.
- The runtime executes it.
- The console window displays the output.
Visual Studio simplifies the process, but internally it uses the .NET SDK to perform all build operations.
Step 6 — Build Without Running
You can build the project separately by selecting:
Build(from top navbar) → Build Solution
Or pressing: Ctrl + Shift + B
This compiles the code without launching the console window.
If there are errors, Visual Studio shows them in the Error List panel.
Debugging Your Console Application
Visual Studio makes debugging simple.
Try this:Add a new line:
int number = 10;- Click on the left margin beside the line to set a breakpoint.
- Press F5.
The application pauses at the breakpoint. You can inspect variables and step through execution.
This is one of the biggest advantages of using Visual Studio.
Summary
Creating a console application in Visual Studio is the fastest way to begin working with .NET. With built-in templates, debugging tools, and automatic SDK integration, Visual Studio simplifies the entire development process.
Your development environment is now ready — and you’ve successfully written and executed your first program.